Exercise Introduction
To conclude the introduction to robotics session, we will simulate a robotic manipulation task.
In this task a robotic arm is presented with a table top environment, where it has to pick up an object and place it at a desired location. With a real world environment the robot has to percieve its environment through sensors. Instead, in this exercise we will rely on environment information provided by the simulator.
The exercise is structured as follows:
Understanding a Robotic Task - Understand how a robotic problem is formulated.
Working Through a Solution - Step-by-step undertsand how to approach a robotic task.
Performing a Task - Stitch together the understanding and solution to perform a task.
The above objectives will improve your understanding on how to work on robotics in general.
The Exercise shall then follow as:
1. Perform a simple pick-place task in the table top environment with a cube object.
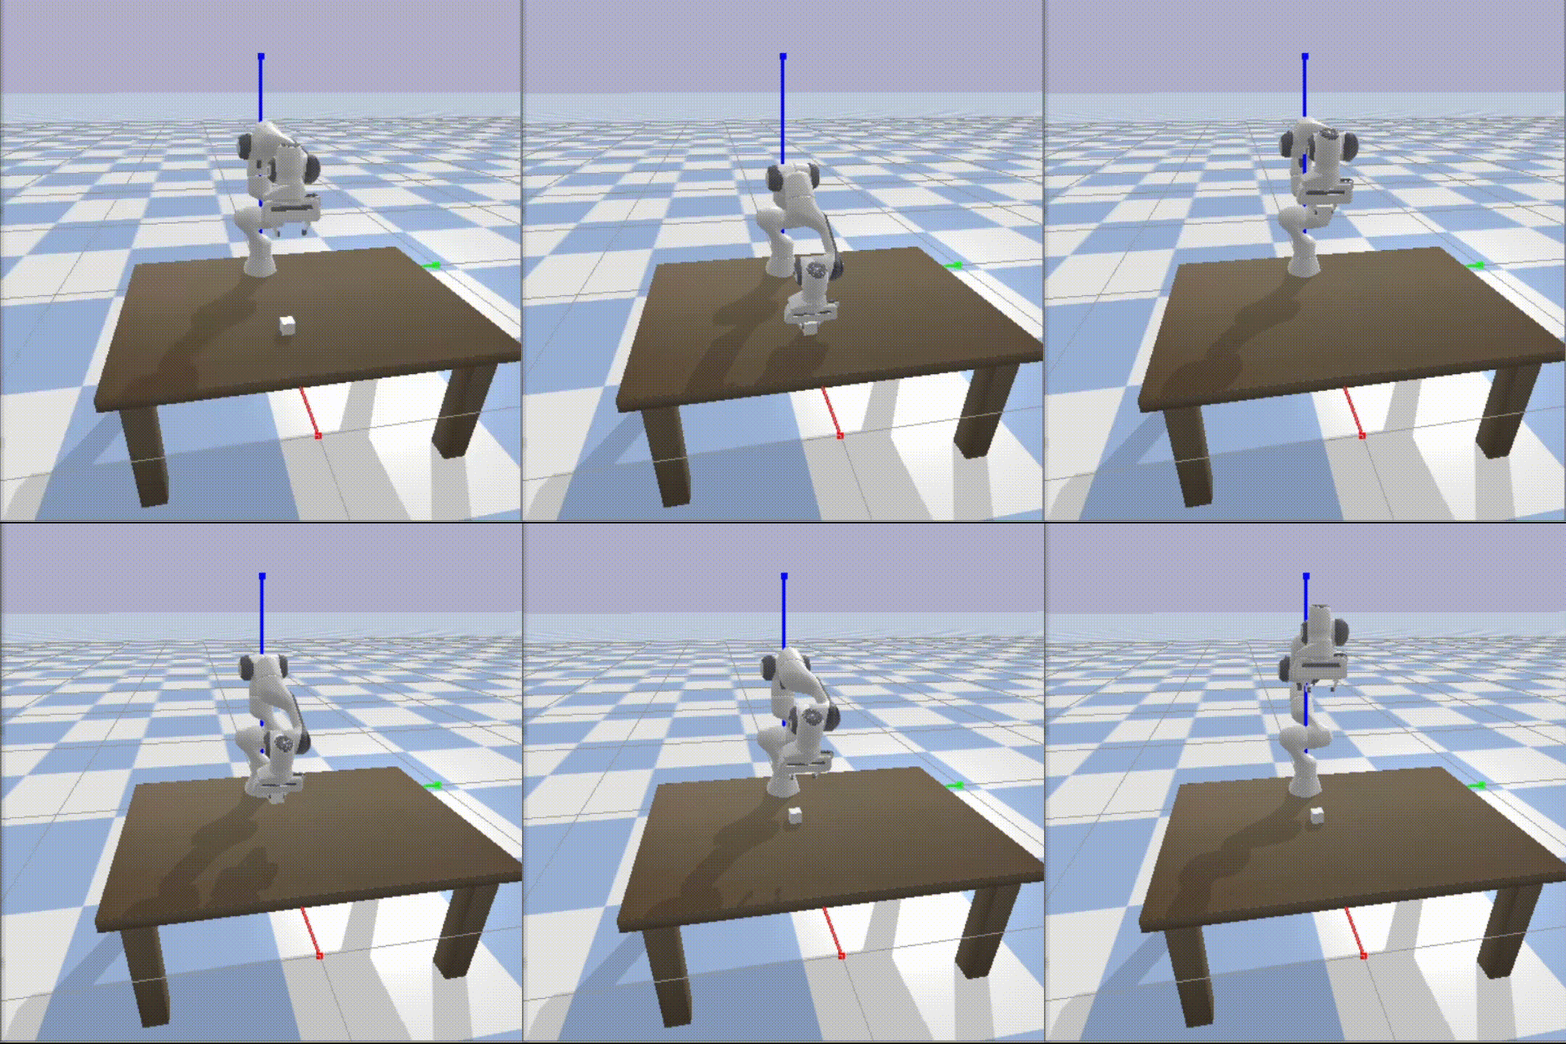
2. Utilise pick-place from previous task to build a small three level stack of cubes.

Installation and Setup (one-time)
We will work with the Pybullet simulator. It is a light weight simulator and can be run in local laptops (windows, linux, mac) and workstation. You don't need CUDA compatible GPU. However, note that your system shall support OpenGL for visualization.
[Optional] If you are familiar with a packages/dependancies manager (virtual environment manager) such as conda, create an environment of your choice.
Install pybullet as
pip install pybullet
0. Getting Started
This section provides an overview of PyBuller simulator. Before proceeding with the exercise, you are encouraged to go through the PyBullet documentation to get an outline of its functionalities.
# Importing required packages

import pybullet as p
import pybullet_data
import time, math
import numpy as np
import random
import os
from enum import Enum
from copy import deepcopy
PyBullet and most of robotics follows a standard urdf format to describe an object, a robot and other entities. Once loaded, these descriptions allow the simulator to handle the geometry and physics of the objects/robot automatically.
Coordinate frames is an important aspect of robotics which helps describe motions and environment to a robot. Hence, when adding an asset (such as a robot or an object) into a simulator, you need to specify its position and orientation in the coordinate frame.
Note that when objects are first added to a simulator, they remain static and no physics is applied automatically. You may need to simulate physics such as gravity, collisions, and motion.
1. Pick and Place with a Manipulator
Now that you are familiar with the basic principles of the simulator, let us move on to creating a simple environment. In this section, we will set up a tabletop scenario with a manipulator arm and one or more objects. Once the environment is ready, we will implement a basic pick-and-place operation.
The goal here is to understand how to (1) define an environment, (2) position both the robot and objects within it, and (3) use low-level control to move the robot’s gripper so that it can grasp an object and place it at a desired location.
1.1 Setting up the environment
# Connect to physics client
# disconnect any physics client running already
if p.isConnected():
    p.disconnect()

physics_client = p.connect(p.GUI)
p.setAdditionalSearchPath(pybullet_data.getDataPath())
p.configureDebugVisualizer(p.COV_ENABLE_SHADOWS, 1)
p.setGravity(0,0,-9.8)
# Load ground plane (using pybullet_data)
base_position = [0,0,-1.1615/2]
planeId = p.loadURDF("plane.urdf", basePosition = base_position)

# Load a table
tablePosition = np.array([0.3,0.1,0])+np.array(base_position) #[0.5,0,-1.1615]
table_orientation = p.getQuaternionFromEuler([0, 0, -math.pi/2])
tableId = p.loadURDF("table/table.urdf", tablePosition, table_orientation, globalScaling=1)
PyBullet allows you to configure parameters for the simulation like the step size etc. Simulating the environment can also be automated, but this might sometimes conflict with our environment setup structure. Hence, we choose to customize simulation with our own function.
# frequency of steps
NUM_STEPS_PER_SECOND = 240

# set the step size in simulator using the parameter NUM_STEPS_PER_SECOND
p.setTimeStep(1/NUM_STEPS_PER_SECOND)


def simulate_world(num_steps_per_second):
    for i in range(num_steps_per_second):
        p.stepSimulation()
        time.sleep(1./num_steps_per_second) #This will make the simulation run at {num_steps}Hz.
    #You can change this value to make the simulation run faster or slower.
1.2 Understanding spwaned assets
A simulator allows you to understand an object by querying its attributes such as:
Base pose: the position and orientation of the object in the world frame.
Joint information: if the asset has joints (e.g., in robots), you can get their type, limits, and current state.
Dynamics: such as mass, friction, and other physical parameters.
Understanding these properties is important because interacting with any object in the simulator, whether static like a table or dynamic like a robot arm, requires precise knowledge of its geometry, pose, and possible degrees of freedom.
Now that you have an idea of what type of information can be gathered, you can try to access this with the help from documentation.
1.3 Adding a Robot
# Spawn franka emika ROBOT robot using pybullet_data
panda_position, panda_orientation = [0,0,0], p.getQuaternionFromEuler([0, 0, 0])
robotId = p.loadURDF("franka_panda/panda.urdf", panda_position, panda_orientation, useFixedBase = 1)
We have spawned a 7-Degree-of-Freedom (7-DoF) Franka Emika ROBOT robot. This means that the robot has 7 revolute joints, which define its primary arm motions. To better understand the robot model in the simulator, refer to the Controlling a Robot section in the PyBullet documentation. In this exercise, we will inspect the robot and check how many joints it contains, what types of joints they are, and what properties they have.
## understand the joint types

# first we need to understand how many joints are there
ROBOT_NUM_JOINTS = p.getNumJoints(robotId)
print("num joints in ROBOT: ", ROBOT_NUM_JOINTS)

# for each joint in the robot, get the joint name, joint_type, physical parameters: damping and friction, and joint limits

JointTypes = Enum("JointTypes", ["JOINT_REVOLUTE", "JOINT_PRISMATIC", "JOINT_SPHERICAL", "JOINT_PLANAR", "JOINT_FIXED"], start= 0)

for i in range(ROBOT_NUM_JOINTS):
    joints_info = p.getJointInfo(robotId, i)
    jname = joints_info[1].decode("utf-8")
    jtype = joints_info[2]
    print(f"linkIdx: {i}, \t Joint name: {jname}, \t Joint type: {JointTypes(jtype).name}, \t damping: {joints_info[6]}, \t friction: {joints_info[7]}, joint limits: {joints_info[8:10]}")
1.4 Configure robot parameters
In many cases, we need to configure certain robot parameters before performing tasks. These parameters include the robot's home position (the default pose from which it starts), the end-effector ID (which identifies the gripper link), and the lower and upper joint limits that define the feasible range of motion for each joint. Setting these parameters correctly is important for safe and effective control of the robot in the simulator. You can also refer to examples provided by pybullet in their repository
# Store ids of moving joints (Revolute joints, prismatic joints[for fingers])
REVOLUTE_JOINTS = [0,1,2,3,4,5,6]
PRISMATIC_JOINTS = [9,10]

# configure the robots end effector id, end effector is the part of the robot which will interact with the objetcs when commanded
ROBOT_END_EFFECTOR_INDEX = 11

# configuring home position for robot: in default configuration what shall be the states of each joints of the robot
ROBOT_HOME_POSITION = [0.002434193097806552, -0.7811217832664136, 0.009772560588829905, -2.062867921360752, -0.007282385107511599, 1.4879767515924243, 0.8049546850317025, 0.0] #joint angles in radians for the panda home position. These values can be obtained from the Moveit ROS or Franka Control Inteface.

# configure the joint limits
JOINT_LOWER_LIMITS = [-2.8973, -1.7628, -2.8973, -3.0718, -2.8973, -0.0175, -2.8973]
JOINT_UPPER_LIMITS = [2.8973, 1.7628, 2.8973, -0.0698, 2.8973, 3.7525, 2.8973]


# The fingers of the robot are already configured for you. You don't need to do anything extra here.
# finger parameters
ROBOT_FINGER_OPEN = 0.04
ROBOT_FINGER_CLOSED = 0
# creating a constraint to keep the fingers centered
def create_finger_constraint(p, robotId):
	finger_constraint = p.createConstraint(
				robotId, 9, robotId, 10,
				jointType=p.JOINT_GEAR,
				jointAxis=[1, 0, 0],
				parentFramePosition=[0, 0, 0],
				childFramePosition=[0, 0, 0])

	p.changeConstraint(finger_constraint, gearRatio=-1, erp=0.1, maxForce=50) #These values are taken from the pybullet examples https://github.com/bulletphysics/bullet3/blob/master/examples/pybullet/gym/pybullet_robots/panda/panda_sim_grasp.py
	return p, robotId

p, robotId = create_finger_constraint(p, robotId)
Great! Now that you understand the robot and its parameters, let’s start building code to interact with it. The first step is to determine whether the robot is currently moving. This can be done by checking the velocity or momentum of each joint. If all joint velocities are close to zero, the robot could be considered stationary. Monitoring this is important because many control commands (such as planning a new trajectory) should only be executed when the robot is not already moving.
def is_robot_moving(p, robotid, joints):
    '''
    args
        p: pybullet_client
        robotid: id assigned to the spawned robot
        joints: the joint ids of the robot which can freely move
    returns
        bool (moving/steady)
    This function will help in identifying if our robot is in motion so we could bring it to rest before stopping the simulation
    '''
    for j in joints:
        state = p.getJointState(robotid, j)
        this_joint_velocity = state[1]
        if not math.isclose(this_joint_velocity, 0, abs_tol=1e-5):
            return True
    return False

is_robot_moving(p, robotId, REVOLUTE_JOINTS)
1.5 Controlling the robot motions
Lets now build towards moving the robot. We should remember that a robot motion is always performed in the robots joint space. Using the same principle we would design a function that achieves this.
def move_robot_to_position(p, robotid, target_positions:list):
    '''
    args
        p: pybullet_client
        robotID: namespace id given to the robot
        target_positions: the target values for each joint
    returns
        It moves the robot to the mentioned target position and should return
        true if succeeded and false if failed
    this function will be used to set joint commands on the robot to guide it's joints to the target_positions
    '''
    for j in range(len(target_positions)):
        joint_type = p.getJointInfo(robotid, j)[2]
        if joint_type == p.JOINT_REVOLUTE:
            p.setJointMotorControl2(bodyIndex=robotid, jointIndex=j, controlMode=p.POSITION_CONTROL, targetPosition=target_positions[j], maxVelocity=.6)
    status = execute_action()
    return status


def execute_action(max_steps=1000, p=p, robotid=robotId, joints=REVOLUTE_JOINTS):
    p.stepSimulation()
    step = 0
    while is_robot_moving(p, robotid, joints) and step < max_steps:
        p.stepSimulation()
        time.sleep(1/NUM_STEPS_PER_SECOND)
        step+=1
    if is_robot_moving(p, robotid, joints):
        return False
    return True

move_robot_to_position(p, robotId, ROBOT_HOME_POSITION)
You can utilise this function to move robot to a defined default position. With provided values the homing action shall look like
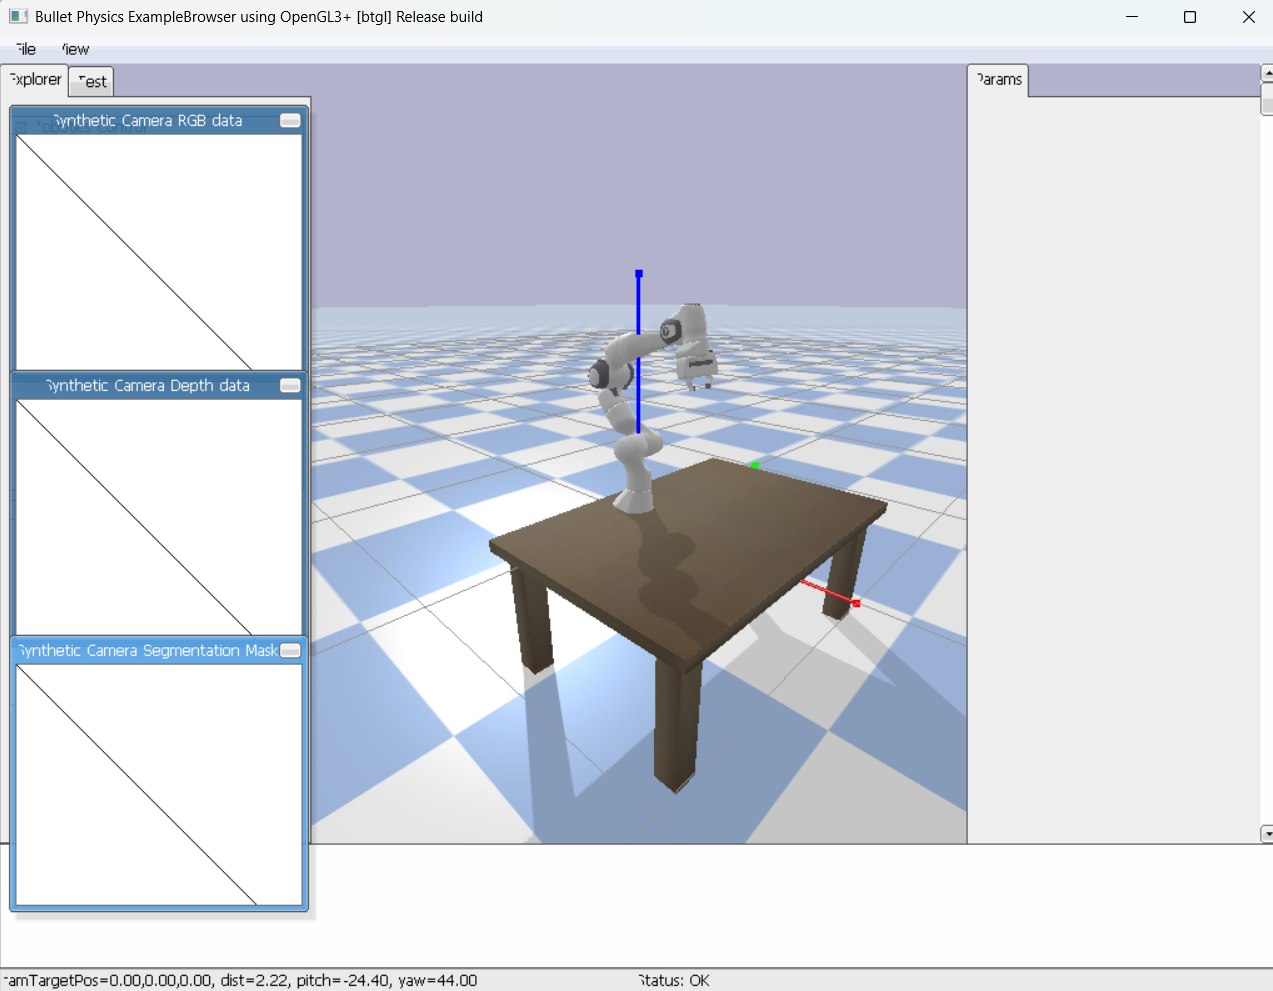
Opening or closing the gripper works in a very similar way to moving any other joint. The main difference is that instead of controlling the arm joints, you set the target positions for the gripper joints.
def command_fingers(p, robotid, open:bool):
    '''
    args
        p: pybullet_client
        robotID: namespace id given to the robot
        open: do we want the robot to open its fingers, otherwise close them
    returns
        bool (success/failure)

    This function will simply close or open robots gripper, so to grasp or release the object
    '''
    command = ROBOT_FINGER_OPEN if open else ROBOT_FINGER_CLOSED
    p.setJointMotorControl2(robotid, 9, p.POSITION_CONTROL, targetPosition=command, force=100)
    p.setJointMotorControl2(robotid, 10, p.POSITION_CONTROL, targetPosition=command, force=100)
    status = execute_action(max_steps = 50)
    return status

command_fingers(p, robotId, open=True)
Spawn the cube object
# using pybullet_data

cube_position = [0.52,0.0,0.09]
cube_orientation = p.getQuaternionFromEuler([random.uniform(-math.pi/2, math.pi/2), random.uniform(-math.pi/2, math.pi/2), random.uniform(-math.pi/2, math.pi/2)]) #random cube orientation
cubeId = p.loadURDF("cube_small.urdf", cube_position, cube_orientation)

simulate_world(num_steps_per_second = NUM_STEPS_PER_SECOND)
Now that we can control both the robot arm and the gripper, let's perform a pick operation on the cube. The process can be broken down into the following steps:
Get the cube's pose through the simulator.
Command robotic motion using inverse kinematics: The joint space is not very simple to understand hence we would specify target position in task space and use inverse kinematics (IK) to get the corresponding target joints.
def pick_object(p, robotid, objectid):
    '''
    args
        p: pybullet_client
        robotid: namespace id given to the robot
        objectid: namespace id given to the object
    returns
        bool (success/failure)

    This function shall command physics client to pick objectid with robotid
    '''
    # First use the objectid to get its position and orientation,
    # Use pybullets inverse kinematics to get robots target joint positions corresponding to the object pose
    object_position, object_orientation = p.getBasePositionAndOrientation(objectid)
    joint_positions = p.calculateInverseKinematics(robotid, ROBOT_END_EFFECTOR_INDEX, targetPosition=object_position, lowerLimits=JOINT_LOWER_LIMITS, upperLimits=JOINT_UPPER_LIMITS,
                                                   restPoses=ROBOT_HOME_POSITION, maxNumIterations=10000, residualThreshold=1e-4)

    move_robot_to_position(p, robotid, ROBOT_HOME_POSITION)
    command_fingers(p, robotid, open=True)
    move_robot_to_position(p, robotid, target_positions=joint_positions[:7])
    command_fingers(p, robotid, open=False)
    move_robot_to_position(p, robotid, ROBOT_HOME_POSITION)
Place the object
Similarly we will use inverse kinematics to place the object at the desired position
def place_at_target_position(p, robotid, target_pose):
    '''
    args
        p: pybullet_client
        robotid: namespace id given to the robot
        target_pose: location at which the object in robots hand is to be placed
    returns
        bool (success/failure)

    this function shall command the physics cliet to place the object at the target_pose
    '''
    joint_positions = p.calculateInverseKinematics(robotid, ROBOT_END_EFFECTOR_INDEX, targetPosition=target_pose, lowerLimits=JOINT_LOWER_LIMITS, upperLimits=JOINT_UPPER_LIMITS,
                                                   restPoses=ROBOT_HOME_POSITION, maxNumIterations=10000, residualThreshold=1e-4)

    move_robot_to_position(p, robotid, target_positions=joint_positions[:7])
    command_fingers(p, robotid, open=True)
    move_robot_to_position(p, robotid, ROBOT_HOME_POSITION)
target_position = [.38, -.15, .08]
pick_object(p, robotId, cubeId)
place_at_target_position(p, robotId, target_position)
1.7 Pick and place with crane like operations
We can see that the motion with previous operations is not very smooth. The robot might sometimes collide with the object. To reduce this kind of inconsistency in robotic motion, instead we will provide the robot some waypoints which will allow more controlled motions.
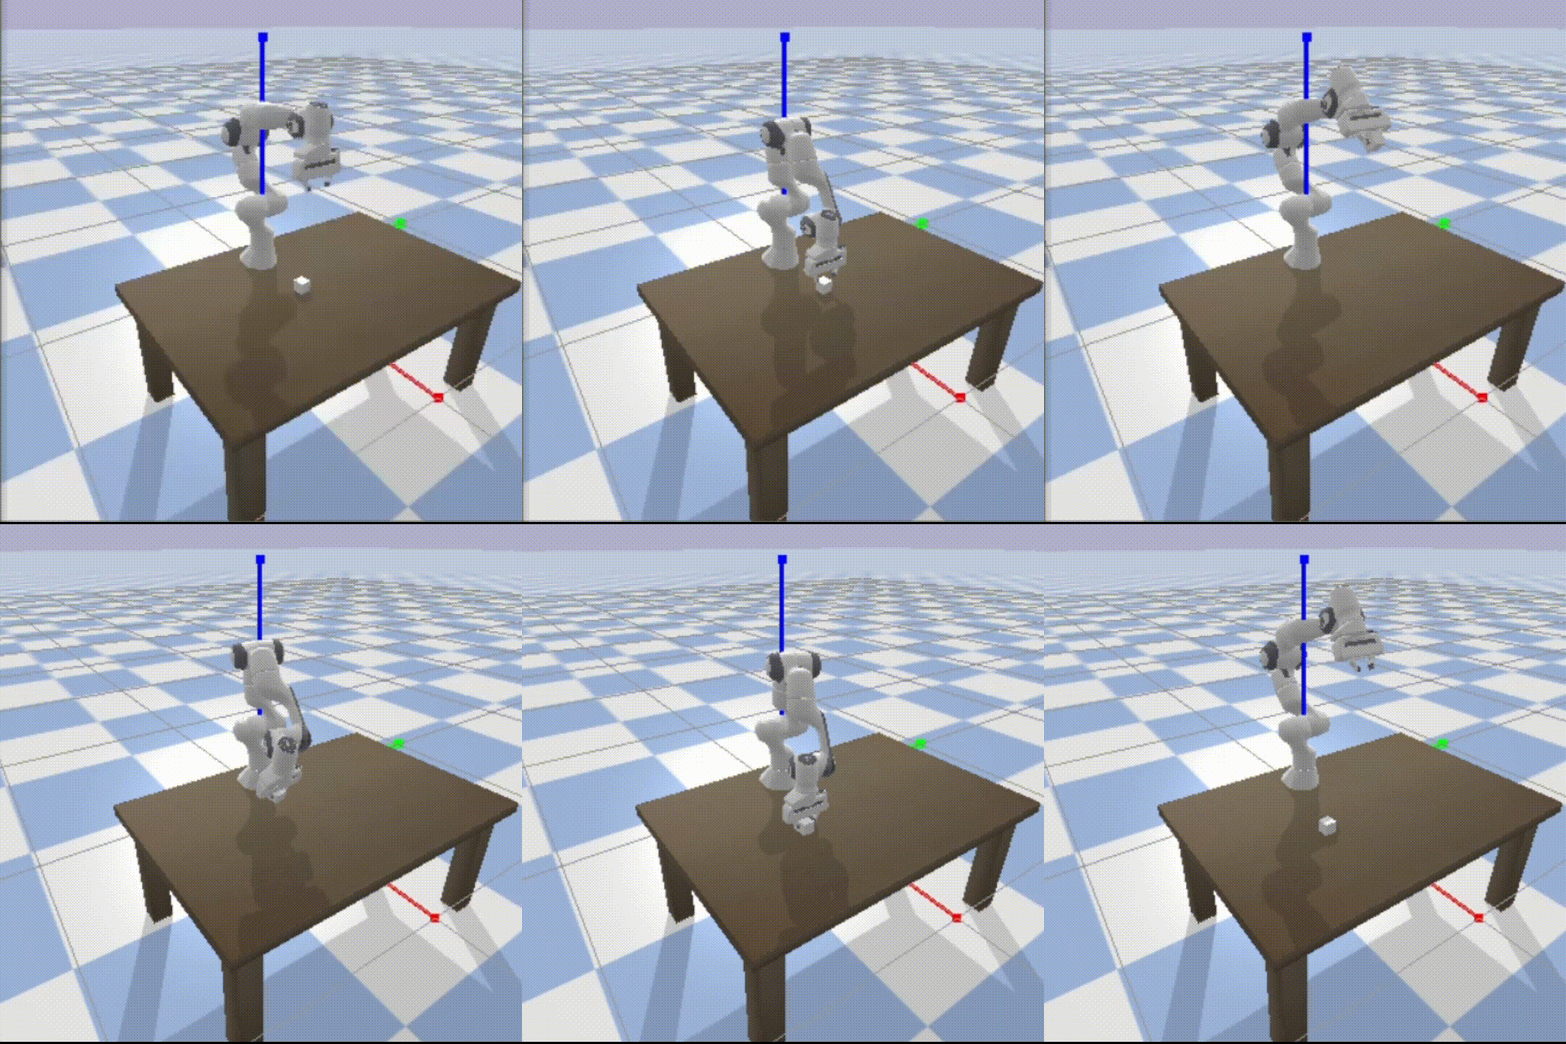 As you can see, this waypoint-based approach provides safer and more reliable pick-and-place operations, reducing the chances of collisions and ensuring more stable placements.
def crane_pick_object(p, robotid, objectid):
    '''
    args
        p: pybullet_client
        robotid: namespace id given to the robot
        objectid: namespace id given to the object
    returns
        bool (success/failure)

    There are many ways a robot can reach target location and sometimes this may lead to undesirable behaviors
    for this purpose, we define an approximate path (through `waypoints`) so robot doesn't take absurd paths
    '''
    object_position, object_orientation = p.getBasePositionAndOrientation(objectid)
    orientation = p.getQuaternionFromEuler([0, math.pi, -math.pi])

    move_up_joint_positions = p.calculateInverseKinematics(robotId, ROBOT_END_EFFECTOR_INDEX,  targetPosition=[object_position[0], object_position[1], object_position[2]+0.09], targetOrientation = orientation,
                                                   lowerLimits=JOINT_LOWER_LIMITS, upperLimits=JOINT_UPPER_LIMITS, restPoses=ROBOT_HOME_POSITION, maxNumIterations=10000, residualThreshold=1e-4)

    grasp_position = p.calculateInverseKinematics(robotId, ROBOT_END_EFFECTOR_INDEX,  targetPosition = object_position, targetOrientation = orientation, lowerLimits=JOINT_LOWER_LIMITS, upperLimits=JOINT_UPPER_LIMITS,
                                                  restPoses=ROBOT_HOME_POSITION, maxNumIterations=10000, residualThreshold=1e-4)

    move_robot_to_position(p, robotid, ROBOT_HOME_POSITION)
    move_robot_to_position(p, robotid, move_up_joint_positions[:7])
    move_robot_to_position(p, robotid, grasp_position[:7])
    command_fingers(p, robotid, open=False)
    move_robot_to_position(p, robotid, move_up_joint_positions[:7])
    move_robot_to_position(p, robotid, ROBOT_HOME_POSITION)


def crane_place_object(p, robotid, target_pose):
    '''
    args
        p: pybullet_client
        robotid: namespace id given to the robot
        target_pose: location at which the object in robots hand is to be placed
    returns
        bool (success/failure)
    '''
    orientation = p.getQuaternionFromEuler([0, math.pi, -math.pi])
    move_up_joint_positions = p.calculateInverseKinematics(robotId, ROBOT_END_EFFECTOR_INDEX,  targetPosition=[target_pose[0], target_pose[1], target_pose[2]+0.09], targetOrientation = orientation,
                                                   lowerLimits=JOINT_LOWER_LIMITS, upperLimits=JOINT_UPPER_LIMITS, restPoses=ROBOT_HOME_POSITION, maxNumIterations=10000, residualThreshold=1e-4)

    place_positions = p.calculateInverseKinematics(robotid, ROBOT_END_EFFECTOR_INDEX, targetPosition=target_pose, targetOrientation = orientation, lowerLimits=JOINT_LOWER_LIMITS, upperLimits=JOINT_UPPER_LIMITS,
                                                   restPoses=ROBOT_HOME_POSITION, maxNumIterations=10000, residualThreshold=1e-4)

    move_robot_to_position(p, robotid, move_up_joint_positions[:7])
    move_robot_to_position(p, robotid, target_positions=place_positions[:7])
    command_fingers(p, robotid, open=True)
    move_robot_to_position(p, robotid, move_up_joint_positions[:7])
    move_robot_to_position(p, robotid, ROBOT_HOME_POSITION)
1.8 Perform a pick and place operation
- with normal pick and place functions and
- with crane like pick and place functioning
try to analyze the difference in motion paths with both methods
target_position = [.36, .2, .08]
crane_pick_object(p, robotId, cubeId)
crane_place_object(p, robotId, target_position)
2. Stacking
In this part of the assignment, you need to build a three-level tower by stacking cube objects on top of each other. You can reuse your pick-and-place implementation from the previous part to perform the action sequences.
It is recommended to use cubes of decreasing sizes for the upper levels. This is because pybullet’s object physics makes it challenging to maintain stability when stacking cubes of the same size—the tower may collapse due to small simulation inaccuracies.
2.1 Setting up the environment
# remove previous objects from the scene
p.removeBody(cubeId)

# spawn three cubes to be stacked
cubeb_position = [0.52,0.3,0.09]
cubem_position = [0.48,0.41,0.09]
cubes_position = [0.4,0.35,0.09]
cube_orientation = p.getQuaternionFromEuler([random.uniform(-math.pi/2, math.pi/2), random.uniform(-math.pi/2, math.pi/2), random.uniform(-math.pi/2, math.pi/2)]) #random cube orientation
cubebID = p.loadURDF("cube_small.urdf", cubeb_position, cube_orientation) #, globalScaling=6/5)
cubemID = p.loadURDF("cube_small.urdf", cubem_position, cube_orientation)
cubesID = p.loadURDF("cube_small.urdf", cubes_position, cube_orientation) #, globalScaling=4/5)
2.2 Perform stacking with pick-place operations
# For each cubeID configure target location and perform pick-place to build a stack
# TODO